PROTOTYPING 101
Do you wish to outperform your competitors? Start investing in UX designs. And when it comes to this, prototyping is the only thing that builds a base for your future products.
In this talk, we want to convince you to start building prototypes. Undeniably, it will transform the way you used to collaborate during a project and will make you grow as an innovative person. It can be much more than this only if you try!
Innovation 101: What is a Prototype?
So, here’s the idea: we’ll start by giving you an understanding of what prototypes are, reveal their benefits and mysterious types. The cherry on top is that we’ll display examples too. There are certain models of prototypes that we will discuss as well, low-fidelity prototypes, high-fidelity prototypes, and rapid prototypes.
Envision you have got an idea and now want your customers’ to give feedback. You wish to trial the idea to check if it’s, in reality, a good one or not, but, how should you go about it? You quickly think of making a prototype; here you start with a sketch. You grab a pen and paper and roughly start drawing what’s in your head. Once you’re finished drawing, you notice that the idea is now onto something tangible and it’s beginning to make sense.
You hire a designer who can create a 3D model out of that sketch. And once that model is ready, further imagine that it is beautifully showcasing the shape, the color, and the required size. You convert it into a file and take a print out for yourself. What do you think you would need now? Don’t you think you need someone who can bring that 3D print into life so that you can gather your customers’ feedback? Isn’t that what you intended to achieve in the beginning? That’s exactly what you do.
Now ask, what comes out as a result? Of course, a prototype. That very 3D print is an early sample of your product that is all set to be tested and replicated into the final product for release. So the idea of prototyping suggests ‘testing a concept before it is presented to the world to ensure that it works fine as envisioned by you.’
The General Benefits of Prototyping
Prototyping is used as a tremendously esteemed method in the Design Thinking Process as they make it conceivable to test an idea without spending lots of time and resources in development.
Following are the general benefits of prototyping:
- Can get genuine insights; an early version of the product displays the reaction of end-users
- Prototypes expose any flaws in the design
- Allows you to make a decision; are you stuck between two different layouts? Not sure whether the color theme is fine or a certain button should be added?
- Can refine your work before you rework
- Show stakeholders a true picture of the concept, well- display the potential benefits, and discuss risks beforehand
- Make changes in the early stage
- Gather early feedback to check what’s best for the end-users
- Can well cater to the exact needs, wants, and problems of the customers
- The ultimate success of the product is guaranteed
- Minimized count of errors before the final product release
An Example of a Prototype
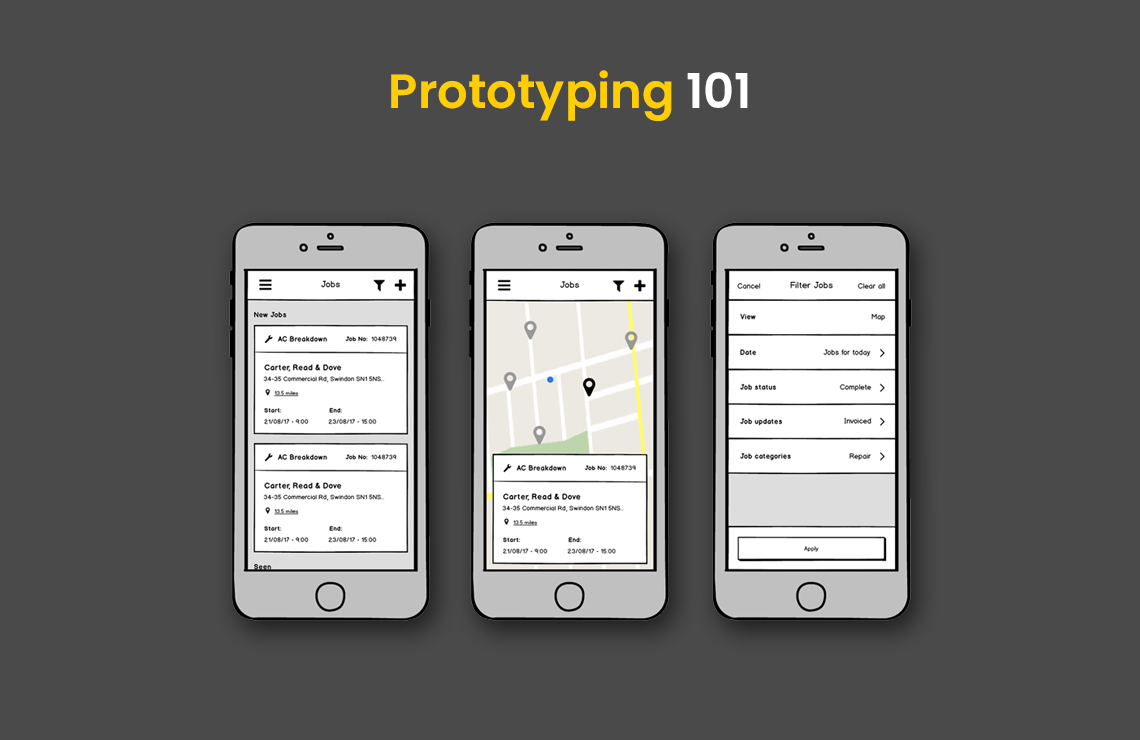
A prototype can be anything from a mock-up made on paper, to a clickable HTML prototype referring to an interactive model of the product. Laying below is a low-fidelity website prototype, a rough representation of the entire site structure, from homepage, product-list, to the calendar, and article page, etc. It is showing limited functions, a quick and easy way to demonstrate the look and feel of the final product.

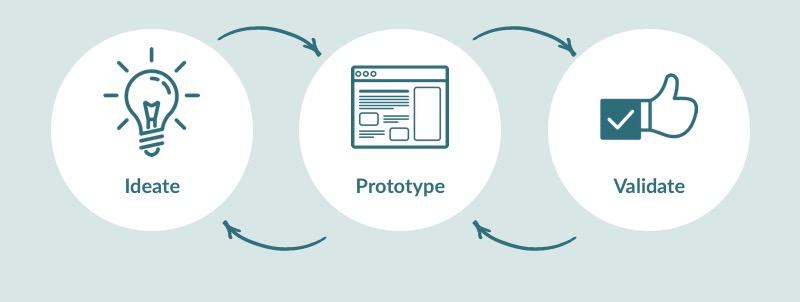
The Prototyping Cycle
You must have already figured that the prototyping model is mostly used in software development with the purpose to meet the end-users exact need. All of the reasons why building a prototype is always the best idea are mentioned above, to acquire this goal, here, we present the complete prototyping cycle for your ease.
Phase 1: Identify
Let’s start with the beginner phase; it is called requirement analysis. During phase 1, you must determine the basic requisites of the product. Either interview the stakeholders or somehow involve the end-users of the system to know what solutions they are expecting.
Phase 2: Develop
Design the first version of the prototype that must include only user interfaces. It will fall into the horizontal prototype category that we will explain later.
Phase 3: Review
In this phase, you must test the first version of the prototype, show it to the stakeholders, and gather their feedback. Based on that feedback, you must revise the design.
Phase 4: Revise
Repeat phase 3 to figure out what could be altered. Wondering why? The answer is product enhancement; a significant improvement can result in a quality product.
A Guide to Proper Fidelity: Low-fidelity prototype vs High-fidelity prototype
You choose a prototype’s fidelity as per the goal of the product. Fidelity denotes a certain level of functionality you wish to portray at the initial stage. It can differ in interactivity and visuals. So, let’s study them in-depth:
Low-fidelity Prototype
A low-fidelity prototype is also called a Lo-fi prototype that is a fast way to trial and checks the functionality of your product. You can begin with a rough-sketch with the ultimate goal to bring that concept in a touchable form. Just follow the initial example we gave you about expressing your idea on a piece of paper.
It can be either a:
- Mockup
- Simulations
- Process sketches
- Storyboards
The biggest benefit a low-fidelity prototype offers is that you can focus entirely on the design prospect. For example, you don’t have to take the pressure of making every page clickable and collaborative.
To further discuss the above-given example, the part where you imagined drawing a rough sketch of your product concept, what if after an in-depth examination you think of a better design idea? With a lo-fi prototype, you can quickly redo the sketch in minutes and come up with an improved scheme. Sound good?
Not good at sketching? Don’t worry, even a non-sketcher like you can participate in a low-fidelity prototype. As we said, you just focus on the menus and flow.
High-fidelity Prototype
A hi-fi prototype you can say is similar to the final product; you must not take a start from this form unless you have a solid perspective of what’s needed to be built. Once you have that understanding, you are good to test it with actual users or stakeholders for approval.
A high-fidelity prototype is extremely interactive, sort of a fully-functional product dummy containing clickable components that will later be used in the final product. The best part is that you get detailed feedback on specific features of the product that could not be demonstrated on a piece of paper.
It can be a:
- A 3D plastic model with moveable parts
- Functions almost like the actual product
Types of Prototyping Model
Prototyping has a few models, we will enlighten you on each like promised initially. Let’s get on with it.
1- Throwaway Prototyping
Also called Rapid Prototyping. The main focus revolves around unclear and clear requirements. The model is entitled throwaway prototyping for the reason that you begin with one design and end up on several unless the clear requirements are understood. Once you have them, you throw the previous designs and focus on the final one. The method is believed to be really useful to gather instant feedback as it helps drives final changes.
2- Evolutionary Prototyping
Everything is taken care of in a systematic form here. In the evolutionary prototyping model, the core duty is to polish the primarily developed prototype. The suggested modifications from the end-users’ side will be incorporated here. Once every unclear feature is understood, you must begin the development.
3- Incremental Prototyping
In this model, the finishing product is built as distinct prototypes and eventually combined into a uni-product.
4- Extreme Prototyping
This model is specifically used for web prototyping. It basically breaks down the development into three stages:
- Static Prototype (HTM)
- Screens are coded, fully-functional simulated layers are designed
- Services implementation
What’s Next?
So, this is everything you need to know about prototyping. Tell us are you influenced?
In this day and age, there are several tools obtainable on the web that can be used to design prototypes. You have InVision, Balsamiq, and others as great tools for quicker development without needing a coder.
They also offer a bunch of plugins to further facilitate low-fidelity designs. But how about working with professionals to get a subscription-free service? A service that is offered without the need for any plugins?
Don’t know how to begin? Contact us to find out how we can help you build a groundbreaking product in a competitive web and app development world.